
Roles, Permissions, Identities, and Groups: How to Use AWS Securely Without Fear of Mistakes

What’s the first thing you should do right after opening your AWS account?
You probably thought about spinning up an EC2 instance (virtual machines) to launch a web server, or deploying your app in a container using ECS (container management).
I hate to break it to you, but before all of that, there’s a less glamorous step: defining which people in your organization can access which resources inside your AWS account.
In other words, you need to put yourself in the shoes of a security guard who keeps track of the access permissions that people in the organization have.
In this guide, we’ll learn how to define those permissions and establish a clean, scalable security policy from day zero. Let’s get started!
Why Is an Access Control Policy Necessary?
The answer might seem obvious when you’re dealing with an organization that has dozens of developers and applications interacting with your cloud services. However, access control is also necessary for solo projects, for two reasons:
- Your project is very likely the result of combining many services within AWS (storage, compute, databases, networking, etc.). These services will interact with each other, so it’s a good idea to have specific permissions associated with each one.
For example, you might run a process on an EC2 instance that reads files from S3, transforms them, and then inserts data into an RDS database. In this case, your EC2 instance should have read permissions on S3 and write permissions on RDS. If these permissions aren’t correctly configured, the entire process we just described won’t work properly.
- Scalability. If your project succeeds (and we hope it does), it’s inevitable that more people will start working with the AWS account. When that happens, having a solid permissions policy becomes mandatory.
Following the previous example, you’ll probably have a database administrator who obviously needs access to RDS. However, that person doesn’t necessarily need permissions for EC2 (if you’re still using it) or S3.
The IAM Service
In AWS, there’s a service for everything. Among them, there’s one designed to manage permissions within the account. Meet IAM (Identity and Access Management).
To understand it, let’s first explain the entities that are part of IAM:
- Policy: A set of permissions that define what can and can’t be done on each AWS service.
- User: An entity created in AWS to represent a person or application that interacts with AWS services.
- Group: A collection of users.
- Role: A set of policies that can be assigned to a user (person or application) or a service.
Hands On
Now that we understand the main concepts of the IAM service, let’s see how to create a user and assign them specific permissions to work only with certain services. Let’s go!
Creating an IAM User
To start, we need to be logged in as the root user, that is, the “owner” of the AWS account.
Before moving on, you’re probably wondering: why do I need to create another user instead of just working directly as root?
The answer is simple: to avoid shooting yourself in the foot. Remember that the root user has permission to do absolutely EVERYTHING inside the AWS account. And as Uncle Ben said, “with great power comes great responsibility.”
The root user could easily delete processes, shut down instances, wipe entire buckets of important data, among other things.
That’s why the recommendation is to create users with fewer privileges and operate with those instead of root. Root should only be used for specific edge cases.
With that said, let’s log into AWS with our root account and search for the IAM service.
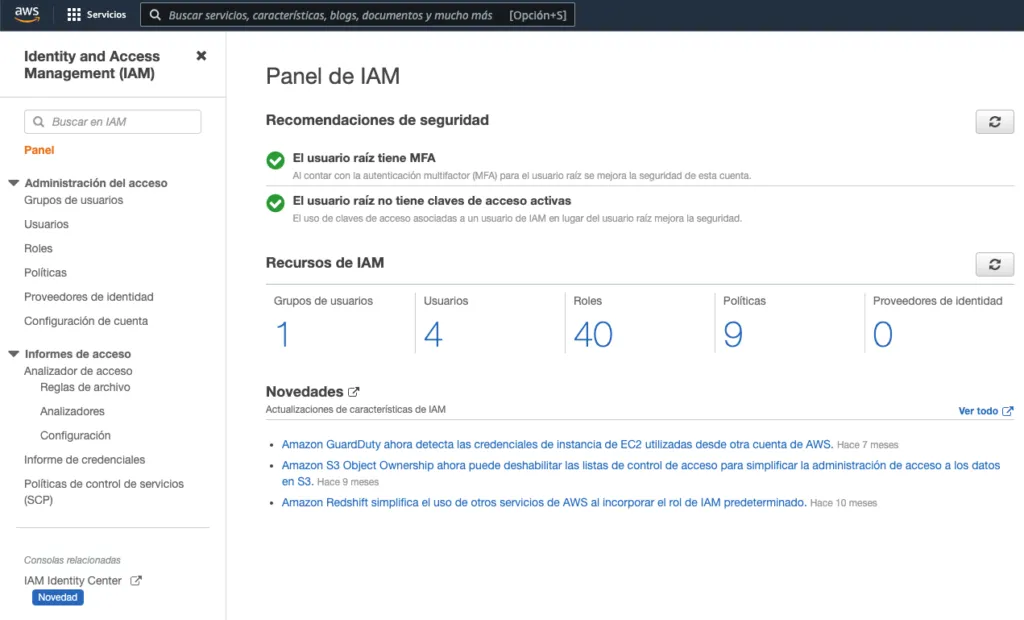
Here we can see the 4 entities we mentioned earlier: Groups, Users, Roles, and Policies. In this particular account, 4 people are working (myself included), and each has 1 user. This means that when I work on the AWS account, I do it with my user (Dario), not root. Let’s take a look at the users:
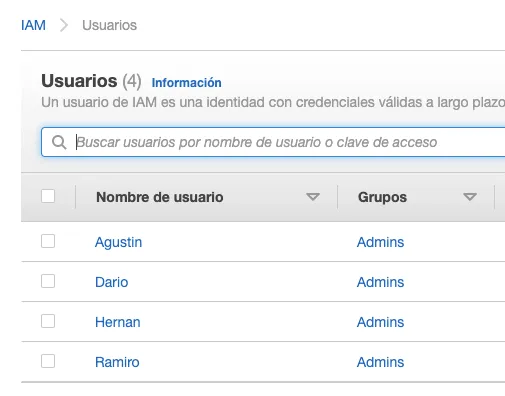
We can see that all users belong to a group called Admins. In this exercise, we’ll create another user called Emilia and add her to a new group called Developers.
We start by clicking the “Add users” button.
Then the following window appears:
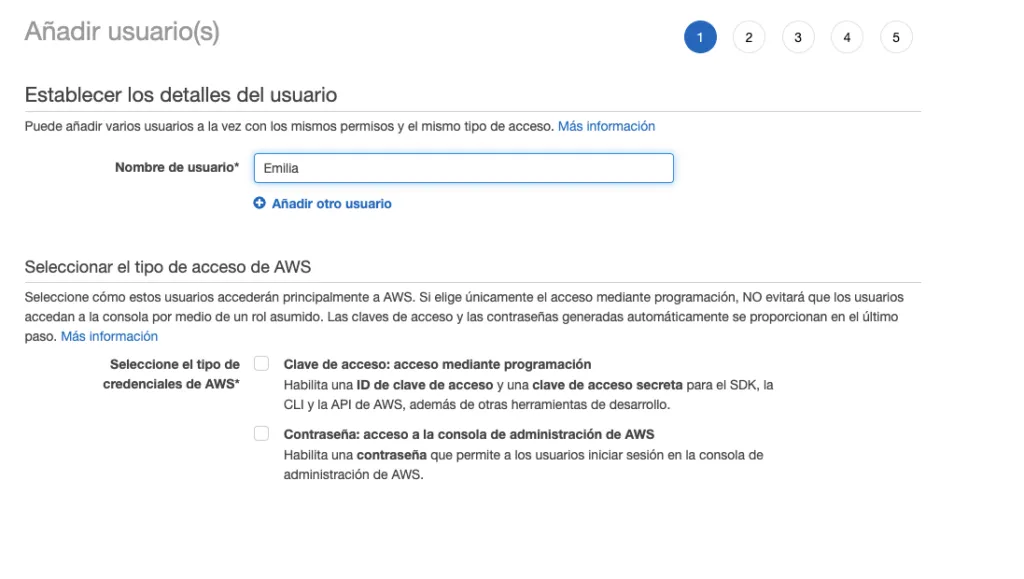
We fill in the desired name (Emilia, for example).
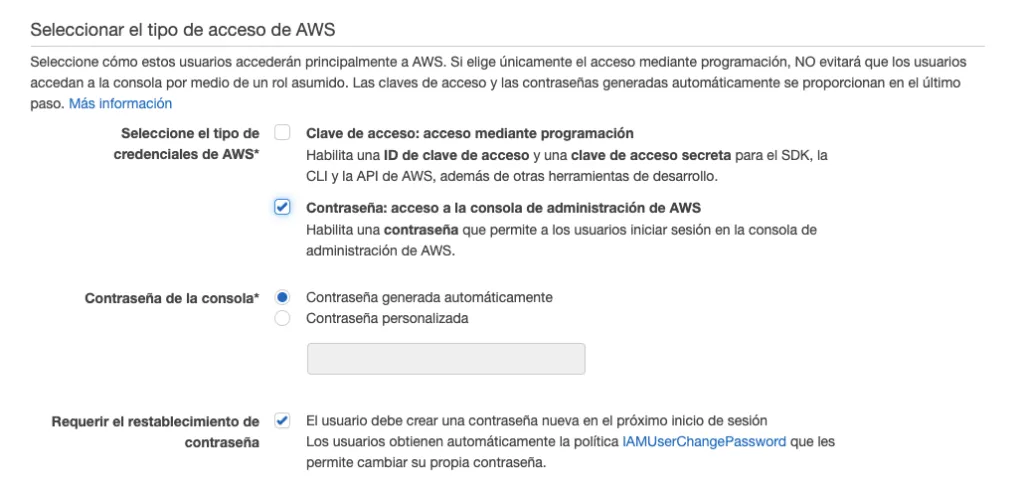
We can see that we need to select the AWS credential type. Here’s what each one is for:
- The first is for application users (in plain terms, an application) and consists of a user (access key) and password (secret access key). This means that when the application needs to access services in our AWS account, it must “log in” with these credentials.
- The second is the classic authentication method with a username and password that we humans use to access any service. Since we’re creating a new user who will be a person, we’ll choose the second option. Here we also need to generate the password.
We can set it manually or let AWS generate it automatically. Finally, if we click the “Require password reset” option, we can force the user to change this password when they first log in (HIGHLY recommended).
The next step is choosing the group for our new user. We can pick an existing group or create a new one.
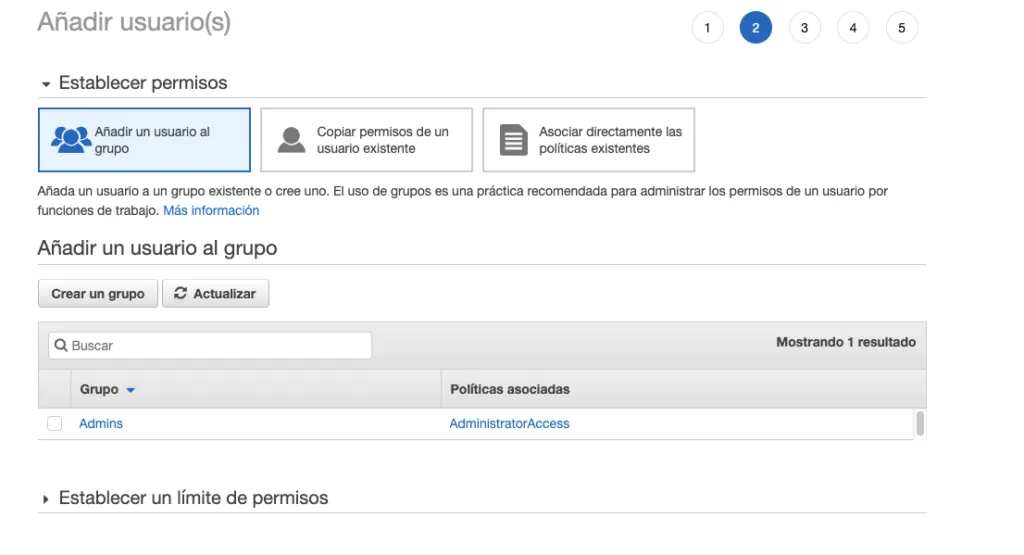
As mentioned earlier, we’ll create a new group called Developers. Click on Create Group.
A new window opens asking for the group name and the policies we want to associate with it. Remember, these policies (or sets of permissions) are what will affect the users in that group.
While we can create our own custom policies (a topic for another tutorial), for now we’ll use the built-in policies that IAM provides. For practical purposes, let’s say this group will only work with the EC2 service. So we’ll assign the AmazonEC2FullAccess policy. Select it and click Create Group.
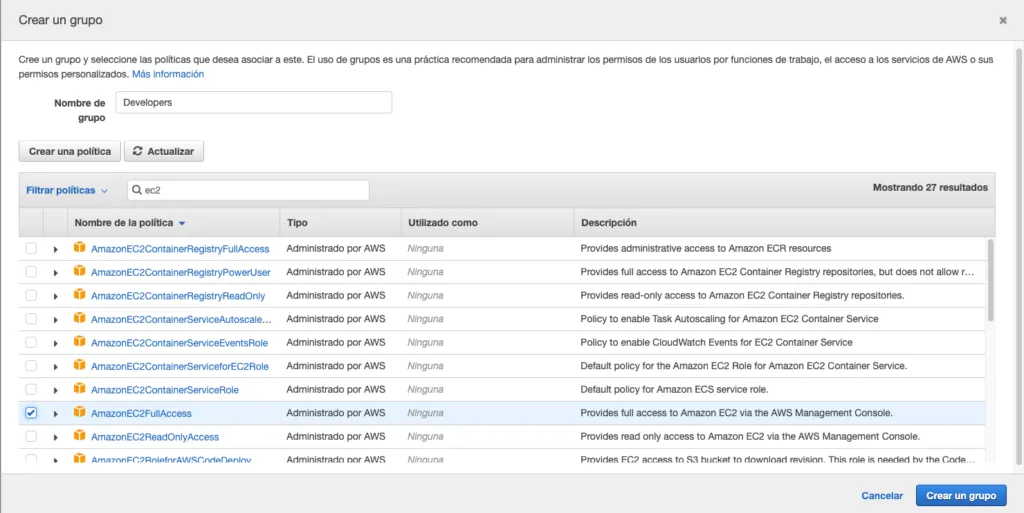
Congratulations! You’ve created a custom group with its own permissions for working in AWS.
The next step in this tutorial involves Tags: a feature that lets us store additional information about the user in key-value format. Some examples:
- email: emilia@deployr.ai
- rol: backend_dev
- team: data_platform
Feel free to get creative and define whatever tags you’d like.
The final step of this tutorial (at last) is simply reviewing the previous steps and clicking Create User.
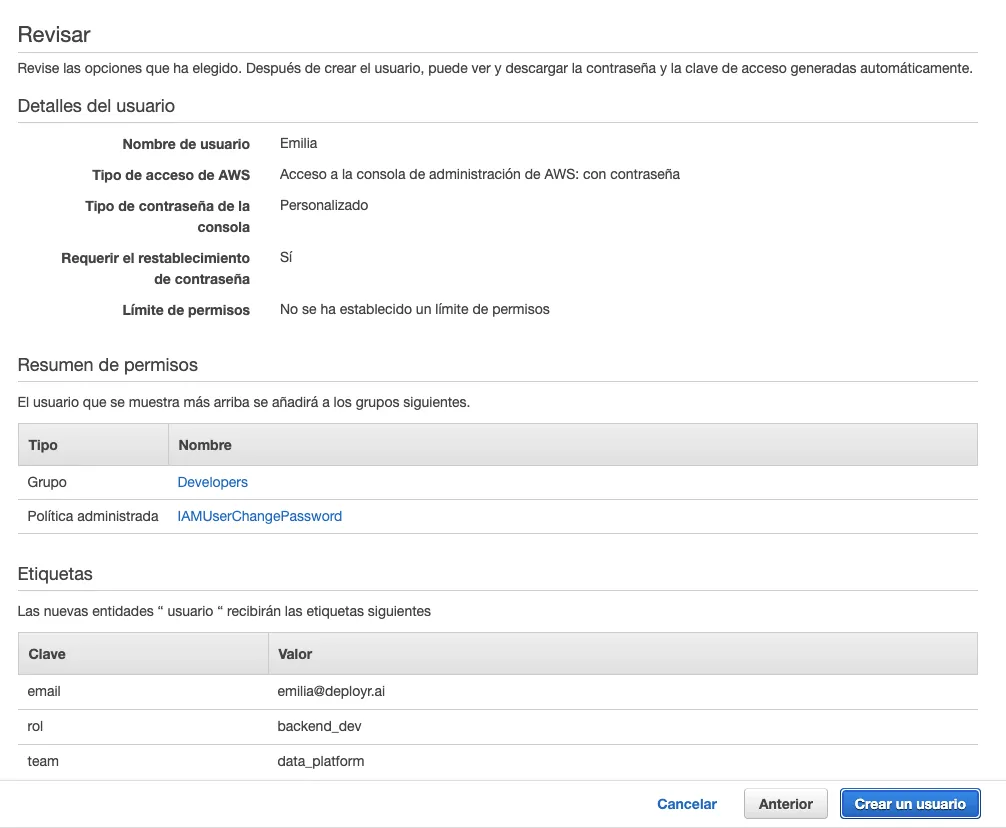
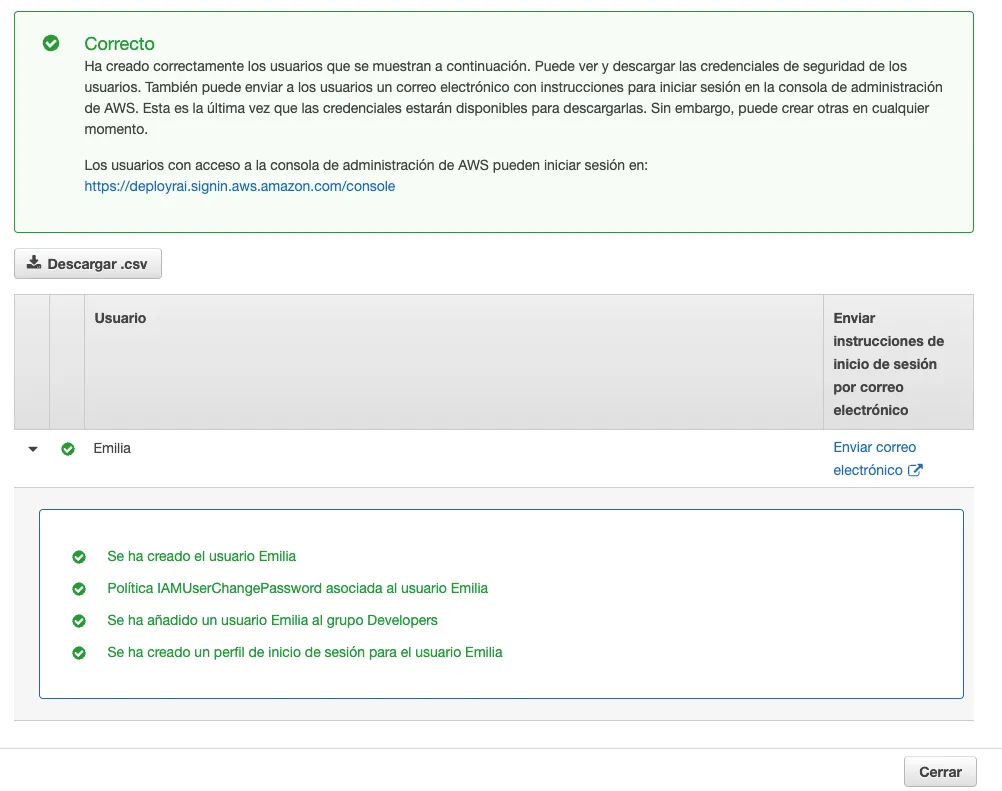
Congratulations! You’ve created a new user for your organization securely and cleanly.
Conclusion
In this tutorial we learned how to create and manage users securely for our AWS account using the IAM service.
What we just did can be reproduced and made as complex as you want, or as your organization requires. That said, simply following these steps is more than enough to get started.


